Popcorn Ceiling Removal Done Right in Royal Oak
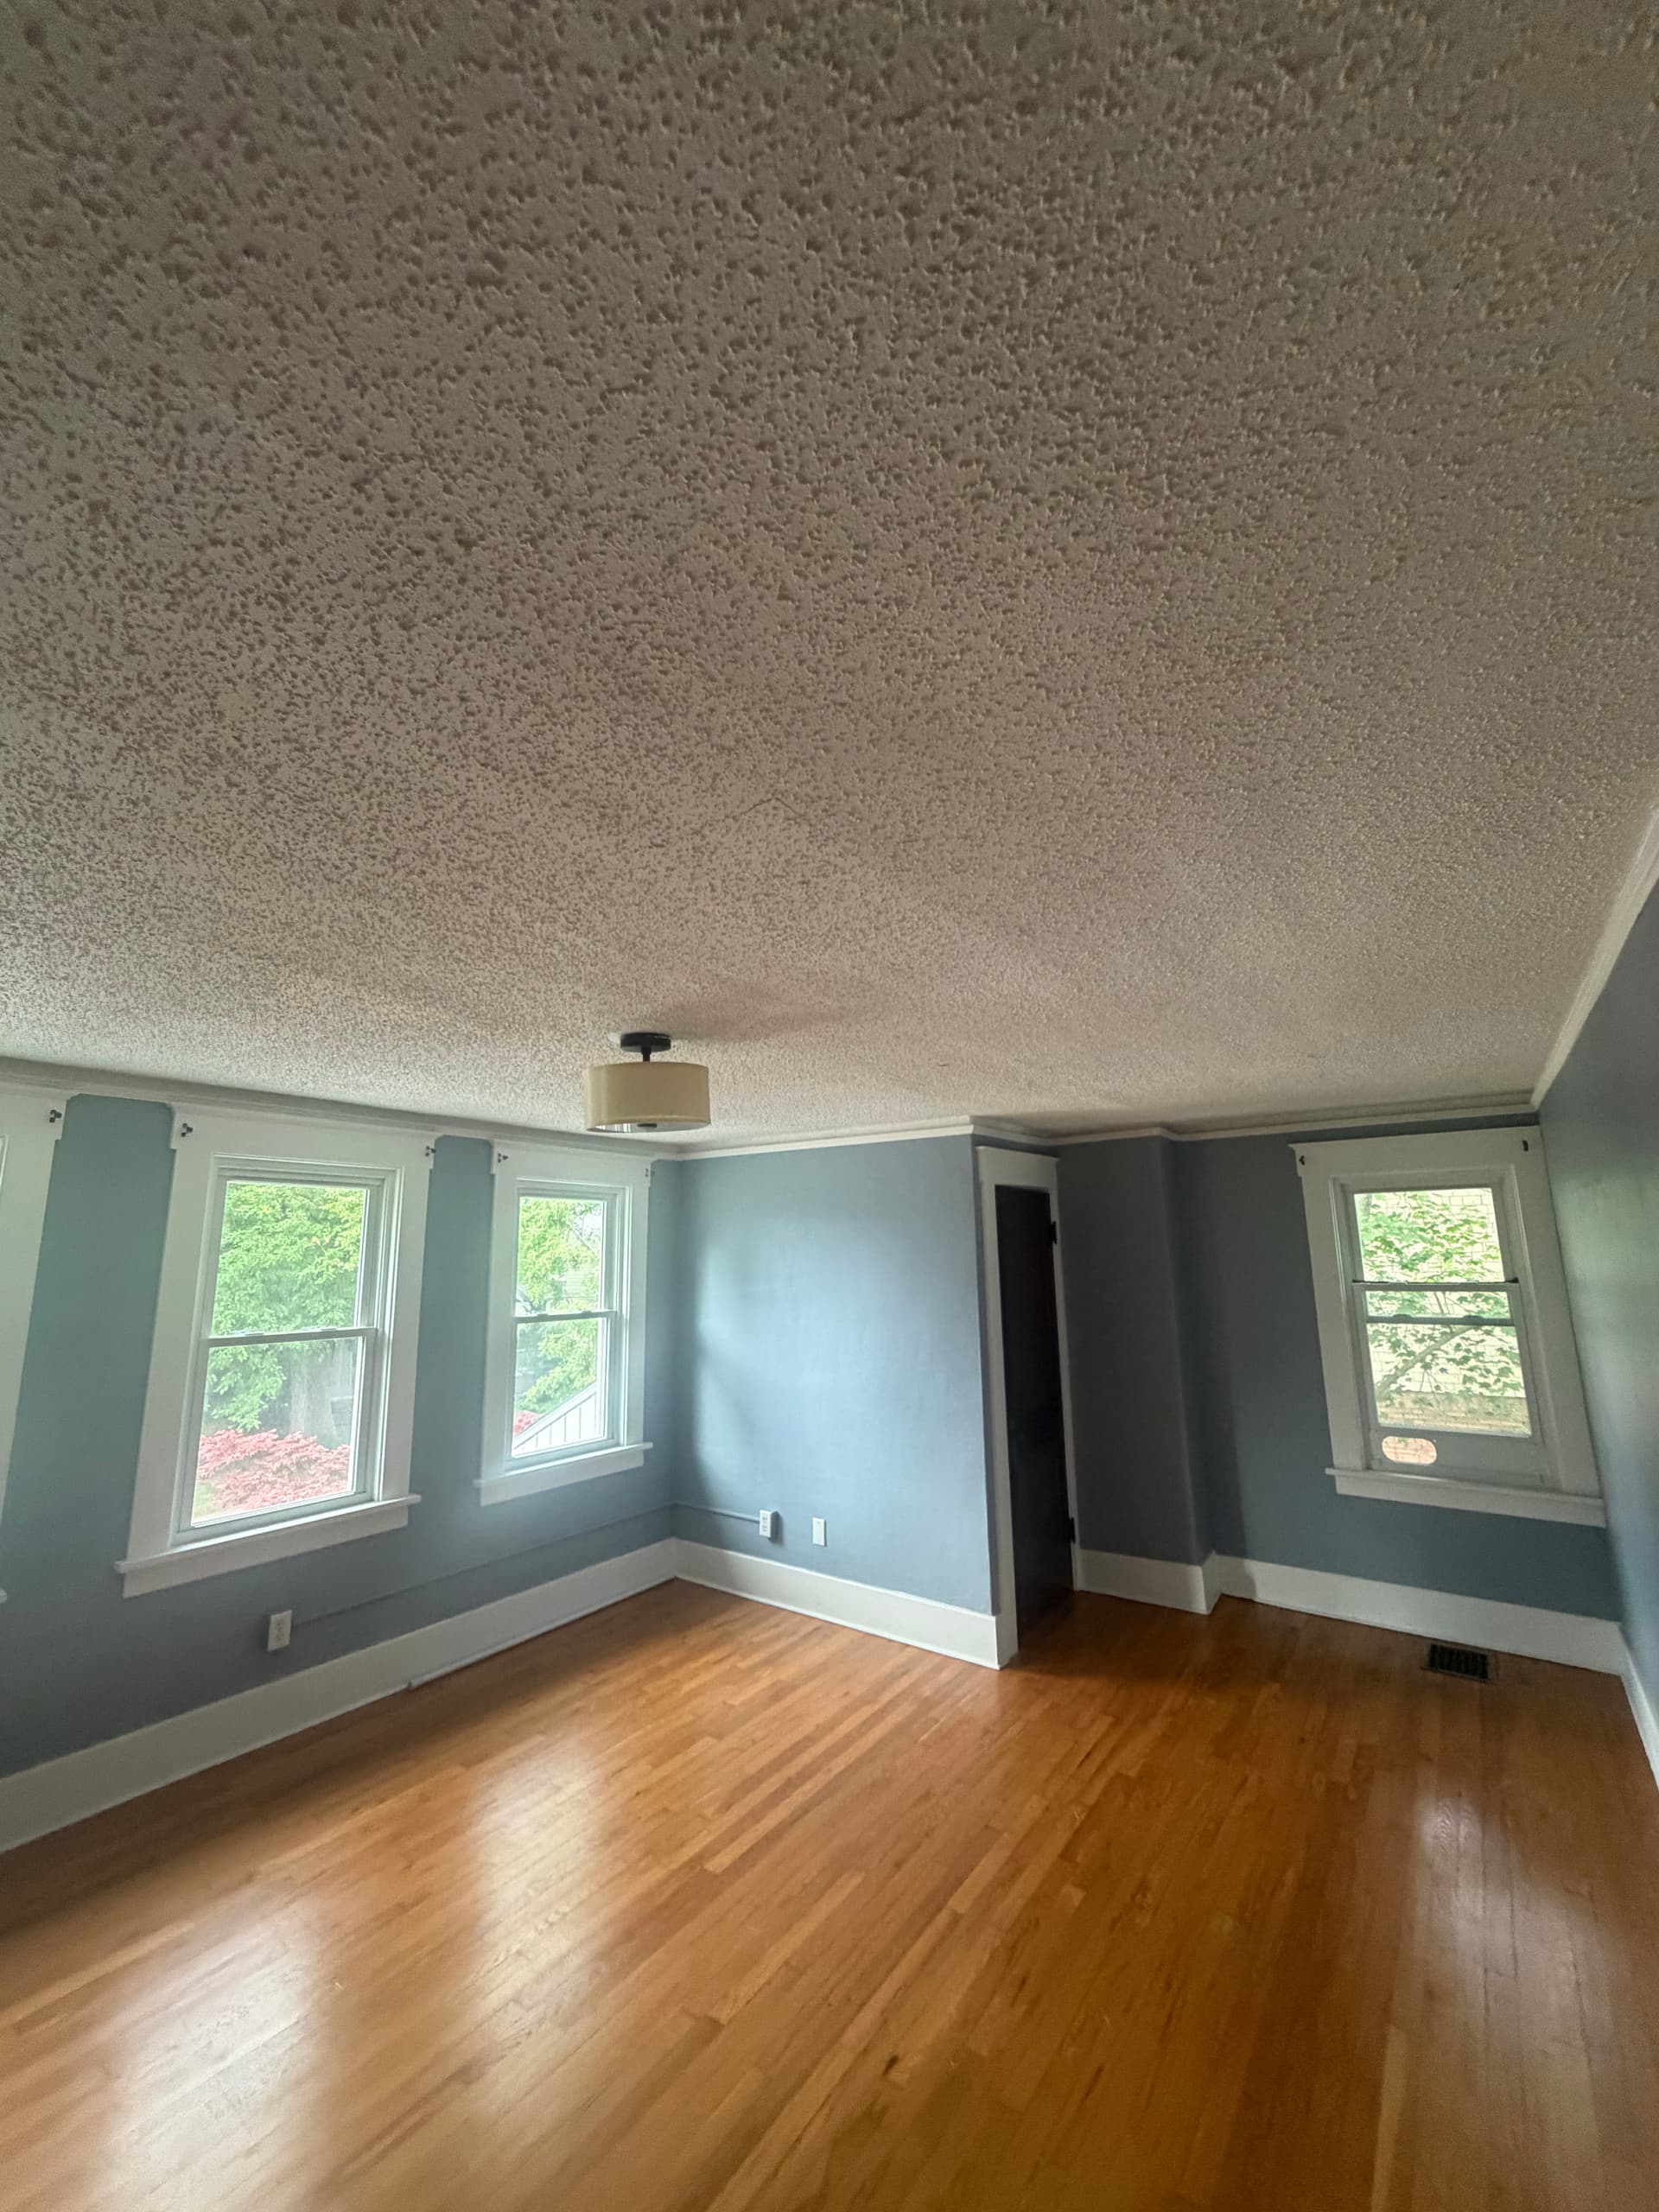
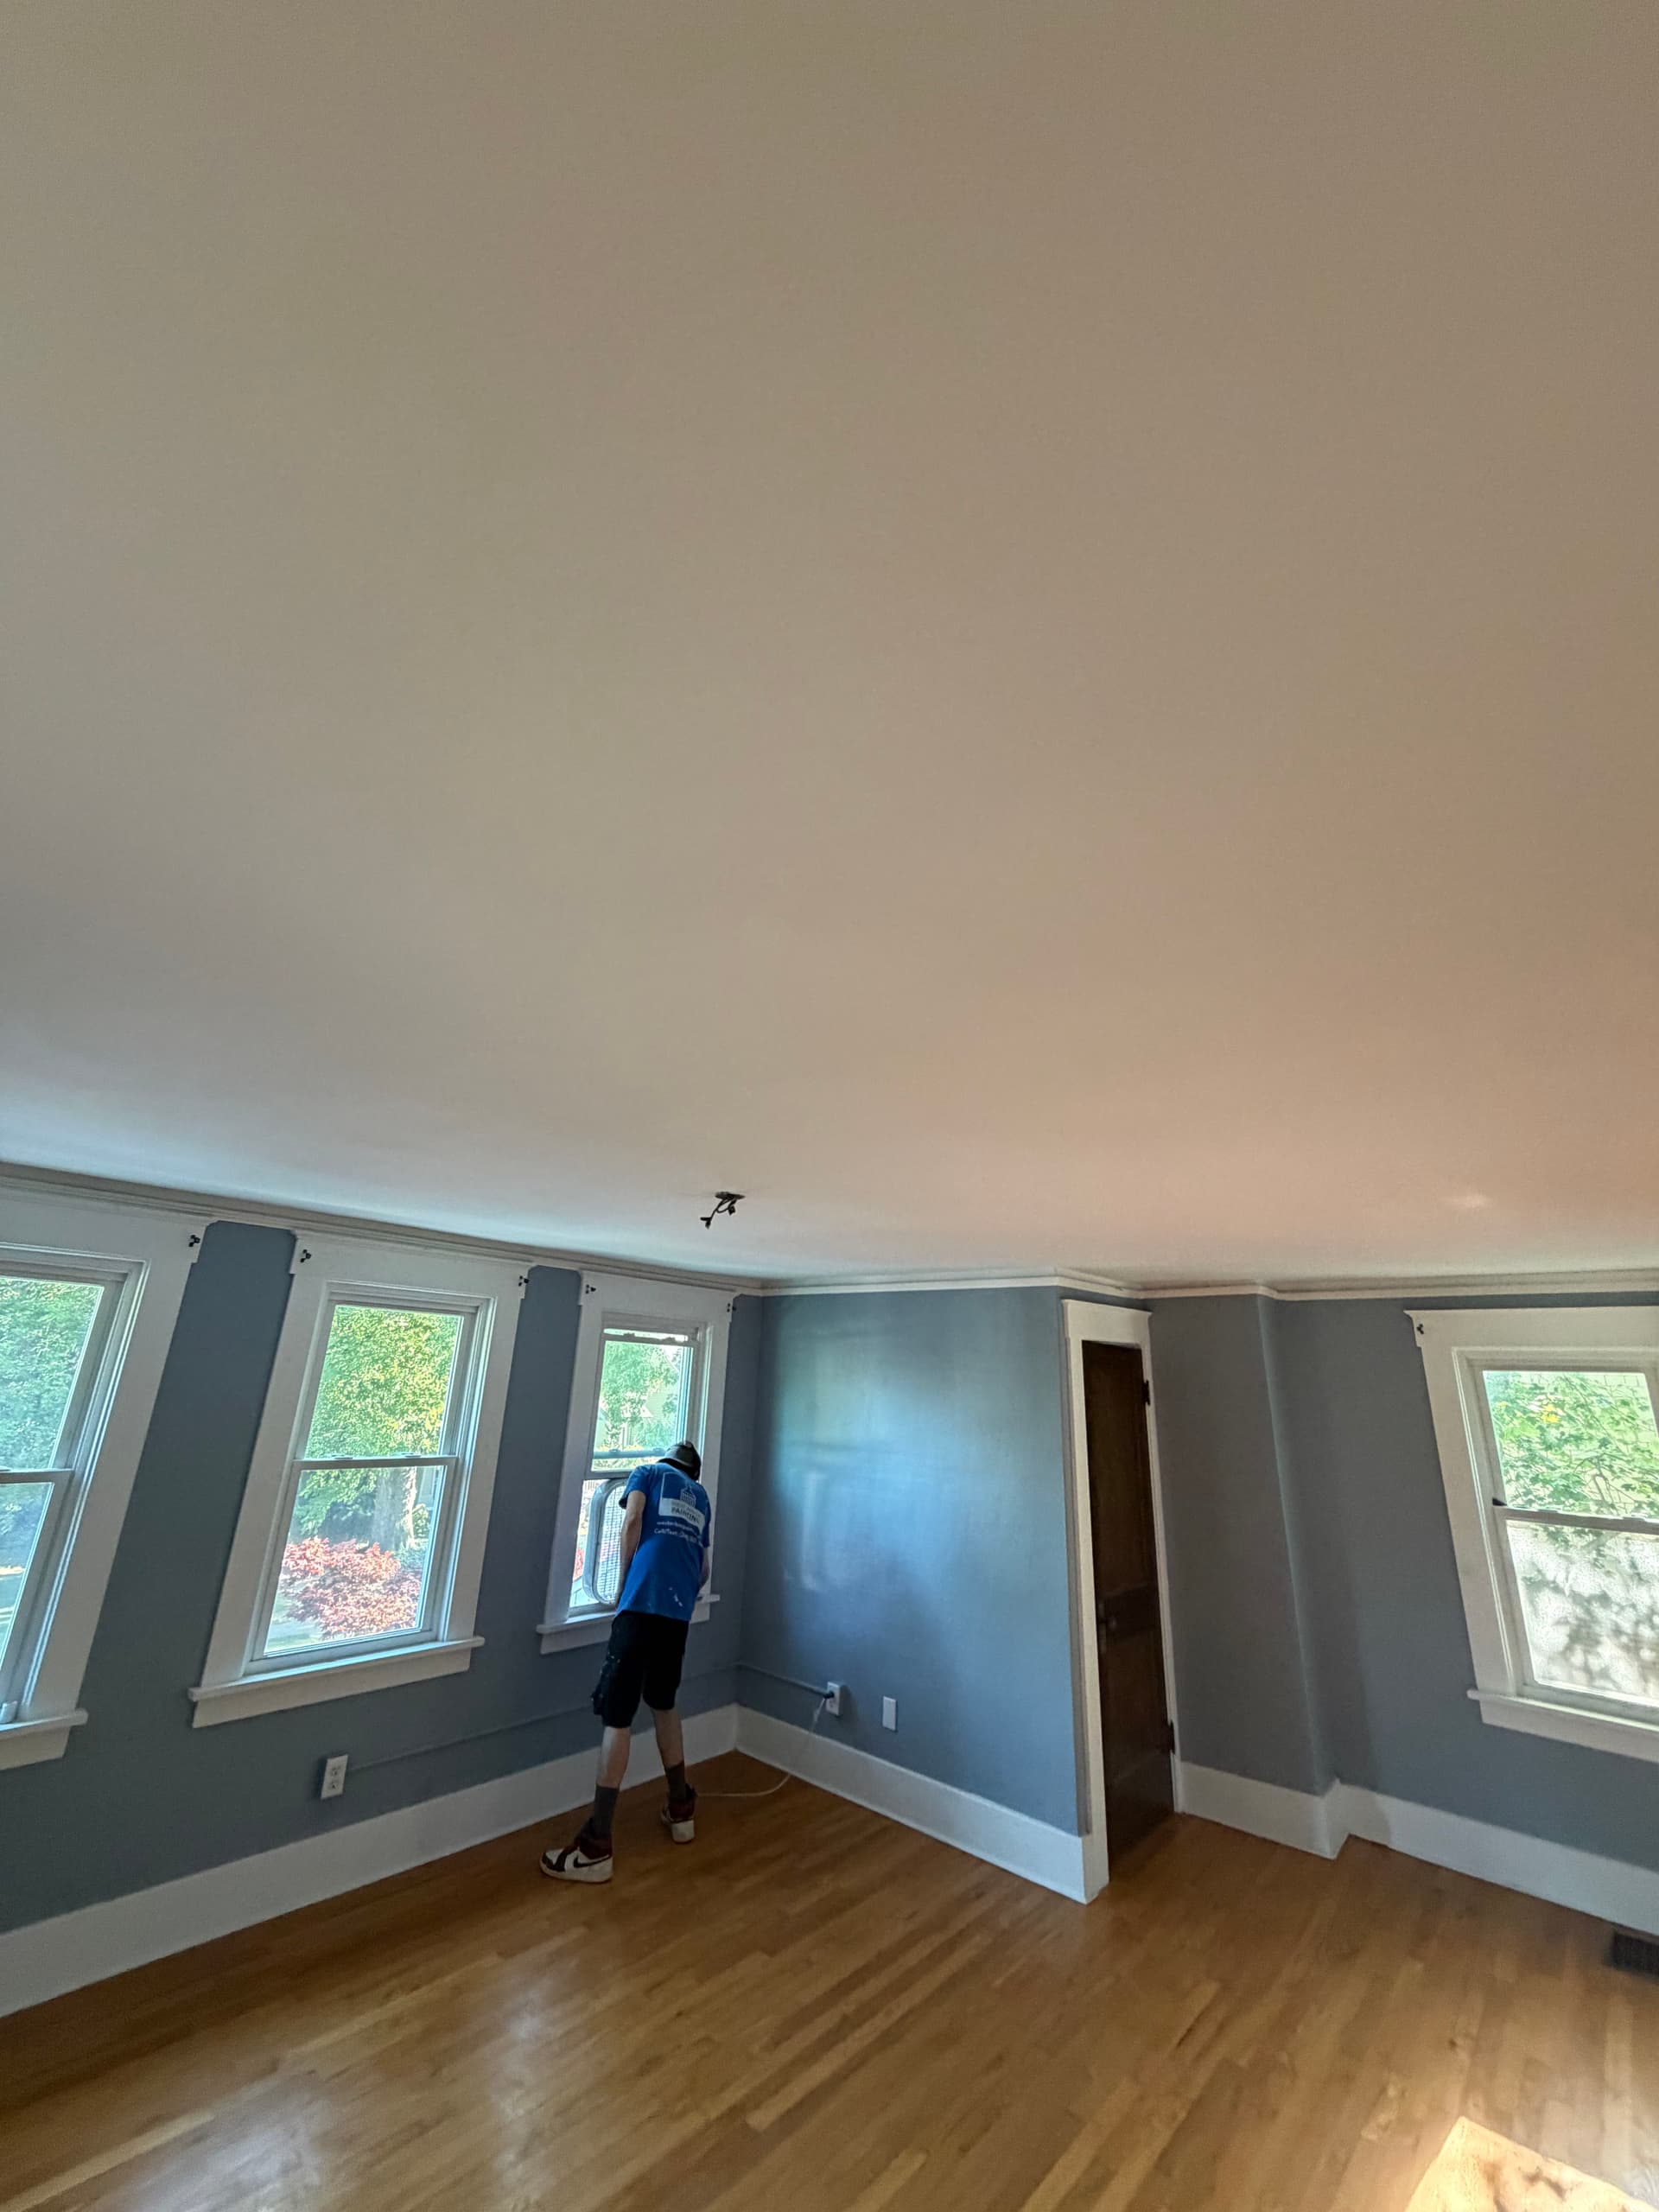
Popcorn ceilings have a way of dating a room instantly. No matter how nice the floors are, how fresh the paint looks, or how updated the trim is - that bumpy, textured ceiling pulls everything back to 1975. That's exactly what we were dealing with on this Royal Oak job.
Here's what the process actually looked like. We started by removing all the texture - the full popcorn removal. Once that was done, the ceiling surface had some plaster damage that needed attention, so we repaired those areas before moving on. Skipping that step is a mistake a lot of people make, and it shows in the final result.
After repairs, we applied a full skim coat across the entire ceiling. That's the step that gets you from "texture removed" to genuinely smooth. Then primer, then paint. Every step has a reason, and cutting any of them short means the finish won't hold up the way it should.
The difference in how the room feels is hard to overstate. The ceiling now reads as part of the space instead of fighting against it. The natural light coming through those windows hits a flat, clean surface and the whole room opens up. That's the thing about smooth ceilings - they don't just look better, they make everything else in the room look better too.
If you've got dated or damaged ceilings and you've been putting this off, it's worth knowing the full process - removal, repair, skim coat, prime, and paint. That's the right way to do it, and that's how we approach every job.